How to Jump Start a Battery
There may come a time when you try to start your vehicle…and nothing happens. In those situations, a dead or discharged battery is often the culprit.
There are a couple of ways to check: If the starter clicks or makes no sound, and the headlights are dim or don’t turn on at all, chances are it’s the battery.
Thankfully, jump-starting a vehicle is easy. All it takes is a set of jumper cables and another running vehicle, and you’ll be on your way.
Before you start
There are a few things you should do before starting:
- Read the safety, jump-starting, and roadside emergency information in your Owner’s Manual

- Have Road side assistance ready in Lincoln Way
- Locate a pair of color-coded jumper cables and a wire brush for removing battery terminal corrosion
- Find each vehicle’s battery: They can be under the hood or in the trunk
- Remove any metal jewelry like rings or bracelets to avoid accidental shocks while working near the battery
- Don’t disconnect the disabled battery—it could damage the vehicle’s electrical system
Jump Starting Your Vehicle
- Move the boosting vehicle close to, but not touching, the vehicle with the dead battery so the jumper cables can connect without being taut. Put both vehicles in Park or Neutral, turn off their ignitions, and set their parking brakes. Turn off or unplug all power-draining items: lights, electronic accessories, and portable devices plugged into auxiliary outlets.
- Open the hood or trunk and remove any battery terminal covers. If you see chalky corrosion on the terminals, remove it with a wire brush terminal cleaner.
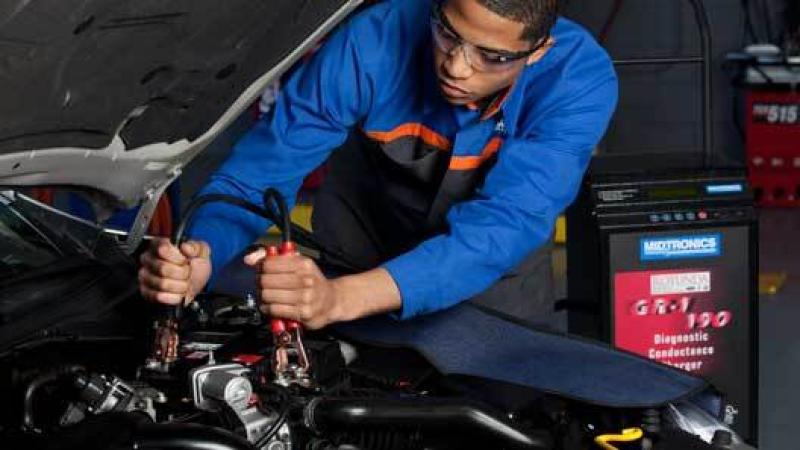
- Clamp the red positive (+) cable onto the disabled vehicle’s red positive (+) battery terminal.
- Next, connect the other end of the red positive (+) cable to the booster vehicle's red positive (+) battery terminal.
- Now connect the black negative (-) clamp to the booster vehicle's black negative (-) battery terminal.
- Connect the other end of the black negative (-) cable to a large, unpainted metal surface in the disabled vehicle’s engine bay, away from the battery and the engine itself. Make sure the cables are clear of any moving parts.
- After a final check, start the booster vehicle. Then try to start the disabled vehicle: Usually it will start right up, but it may need to charge for a few minutes before starting. Once it starts, allow both vehicles to run connected for about three minutes.
- Without turning off the jump-started vehicle’s engine, disconnect the cables in the reverse order that they were attached, and close the hoods/trunks.
- Allow the jump-started vehicle’s engine to run for several minutes. Depending on how discharged it is, the battery may not be able to start again under its own power, so keep it running until you reach your destination.
- Visit your local dealership as soon as possible to get the jump-started battery tested or replaced.
Quick Tip
Have your battery tested at your local dealership if you see or experience the following:
- Corrosion around the terminals or posts
- Damage on the terminals or posts
- Frays or cuts in the battery cables
- Loose battery cables or terminals
- Worn drive belts
- Bulging or deformation in the battery casing
- Movement or wiggling of the battery in its mounting
- Constant charging or electrical system problems
- Difficulty getting your engine to start
For specific information on your vehicle, refer to your Owner's Manual.
 How to Jump Start a Battery
There may come a time when you try to start your vehicle…and nothing happens. In those situations, a dead or discharged battery is often the culprit.
There are a couple of ways to check: If the starter clicks or makes no sound, and the headlights are dim or don’t turn on at all, chances are it’s the battery.
Thankfully, jump-starting a vehicle is easy. All it takes is a set of jumper cables and another running vehicle, and you’ll be on your way.
Before you start
There are a few things you should do before starting:
- Read the safety, jump-starting, and roadside emergency information in your Owner’s Manual
- Have your Roadside Assistance number handy
- Locate a pair of color-coded jumper cables and a wire brush for removing battery terminal corrosion
- Find each vehicle’s battery: They can be under the hood or in the trunk
- Remove any metal jewelry like rings or bracelets to avoid accidental shocks while working near the battery
- Don’t disconnect the disabled battery—it could damage the vehicle’s electrical system
Jump Starting Your Vehicle
- Move the boosting vehicle close to, but not touching, the vehicle with the dead battery so the jumper cables can connect without being taut. Put both vehicles in Park or Neutral, turn off their ignitions, and set their parking brakes. Turn off or unplug all power-draining items: lights, electronic accessories, and portable devices plugged into auxiliary outlets.
- Open the hood or trunk and remove any battery terminal covers. If you see chalky corrosion on the terminals, remove it with a wire brush terminal cleaner.
- Clamp the red positive (+) cable onto the disabled vehicle’s red positive (+) battery terminal.
- Next, connect the other end of the red positive (+) cable to the booster vehicle's red positive (+) battery terminal.
- Now connect the black negative (-) clamp to the booster vehicle's black negative (-) battery terminal.
- Connect the other end of the black negative (-) cable to a large, unpainted metal surface in the disabled vehicle’s engine bay, away from the battery and the engine itself. Make sure the cables are clear of any moving parts.
- After a final check, start the booster vehicle. Then try to start the disabled vehicle: Usually it will start right up, but it may need to charge for a few minutes before starting. Once it starts, allow both vehicles to run connected for about three minutes.
- Without turning off the jump-started vehicle’s engine, disconnect the cables in the reverse order that they were attached, and close the hoods/trunks.
- Allow the jump-started vehicle’s engine to run for several minutes. Depending on how discharged it is, the battery may not be able to start again under its own power, so keep it running until you reach your destination.
- Visit your local dealership as soon as possible to get the jump-started battery tested or replaced.
Quick Tip
Have your battery tested at your local dealership if you see or experience the following:
- Corrosion around the terminals or posts
- Damage on the terminals or posts
- Frays or cuts in the battery cables
- Loose battery cables or terminals
- Worn drive belts
- Bulging or deformation in the battery casing
- Movement or wiggling of the battery in its mounting
- Constant charging or electrical system problems
- Difficulty getting your engine to start
For specific information on your vehicle, refer to your Owner's Manual.